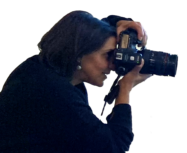
In my research I have come across many great ways to use Adobe Photoshop to enhance and touch up photographs. In this blog, I’d like to share a quick, simple and fun technique for you to try out.
As an example I’ve chosen a portrait of a 3 month old baby from a photo shoot I did recently. I find this technique works quite well on younger skin; however on older skin, advanced techniques are more suitable to be able to maintain a more natural skin texture.

Open up your chosen portrait photo and click on your layer palette.

Duplicate the layer by right clicking it for the “duplicate” option.
Click on the duplicated layer and go to “Filter”, “Blur” and then “Gaussian Blur “.
Add enough blur on your image to soften the skin, in this case I used about 20 but you can experiment with that.

Then on that same layer, add a mask by clicking the symbol at the bottom of the layer palette, the one with the grey square and white circle. Then you’ll see a white box next to your duplicated image.
Ensure you click onto that white box as that’s where you will be working.
Now you need to fill that mask with black, so get your fill tool, click black on the colour palette and fill your image. You will now see the image look the same as your background layer. So on your layer palette the box will become black. Ensure your mask box on your layer palette is still highlighted.


Now you are ready to paint. So click on your brush icon from your tool palette and ensure your paint colour is white.
Start with around a size 50, increasing size for more general areas and reducing brush size for intricate areas near edges. You can also lower the opacity of the brush to 50 be more subtle. Keep to the main skin areas, any mistakes can be simply rectified by swapping your brush palette from white to black to take out the blur. Zoom right in on areas that are close to any creases, hair, eyes and lip areas, so you don’t blur those key areas out. With careful brushstrokes your subject should be suitably smooth.

Below are a couple of before and afters using the same technique…


In the image below you can see how effective the gaussian blur layer is. Inevitably during a baby photo shoot, despite many wipes, baby dribbling can occur. In this case it was gone thanks to brushing over the area to reveal the gaussian blur layer underneath.


So do try it out and and let me know how it goes. You also welcome to send me links to your work so I can view your results.
13 thoughts on “Photoshop tips – portrait touch up tutorial”
Comments are closed.

This site was… how do I say it? Relevant!
! Finally I've found something that helped me. Thank you!
Interesting^^
Nice to read your blog
nice tutorial!
nice post.
thanks
So cute.. Thanks a lot for sharing.
Thanks for that 😉
This does look promiinsg. I'll keep coming back for more.
Free info like this is an apple from the tree of knowledge. Sinful?
Thanks Peter
Saw you blog and found the data v useful, thanks.
fb and twitter link should be on this page
However…
fb – https://www.facebook.com/Sophie.Sheinwald.Photography
twitter – sophie_snap
Great! thanks for the share!
thank you!